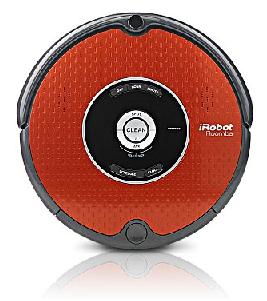
Roomba Repair : Quick and Simple Fixes for your Roomba

Roomba Repair Important Notes
Before attempting to do a Roomba repair, please note that:
1. Self-repair will VOID your warranty
2. It is MUCH harder to re-assemble a robot than to disassemble one
3. Always use eye protection (goggles) and a dust mask when attempting to fix a robot
The Roomba robotic vacuum cleaner has made home cleaning much simpler and faster. But for anyone looking to purchase one of these robot vacuum cleaners, it’s important to know that life will not magically and permanently become easier. Problems can still occur with your Roomba, especially if not cleaned regularly. Below are a few relatively simple techniques for Roomba repair, that is, getting your little robotic domestic servant up and going again.
The most common problem reported by Roomba owners is its battery. There may come a point when the unit will no longer seem able to hold a charge. Some people suggest resetting and cycling the unit, which is done by removing the battery, holding down its power button for 5 to 15 seconds, reinstalling the battery and charging the Roomba until the power light is green again. Once this happens, keep the Roomba charging for an additional 72 hours, without interruption.
Afterwards, the Roomba should be run continuously until the battery is completely exhausted. The process should then be repeated a couple more times, until an improvement is seen. If nothing happens, the unit owner will have to purchase a new battery.
See: iRobot Roomba Batteries with 15% - 50% Longer Battery Life
Other common problems with the Roomba include having fuzz or hair trapped within, which affects its performance. When this happens, it is recommended to clean the unit with compressed air. If the unit still doesn’t function properly, the following site teaches you how to access the Roomba’s Diagnostic Mode:
Some owners report incidents of their Roombas refusing to advance beyond six inches from where it starts. It starts then stops immediately, or just spins in place. It is suggested that one should clean the robot’s cliff sensor, brushes, and brush bearings when this happens. Use compressed air, especially around the wheels and under the bumper, or tap the bumper with your hand. If this does not solve the problem, another suggestion is to give the vacuum a firm push on top, directly above where the center wheel is situated. The problem could be that the center wheel near the front of the unit is not in its proper recessed position since the wheel is adaptable. This Roomba repair method has worked for some.
See:
Another common Roomba problem is the “Circle Dance.” This is when the Roomba immediately begins circling backwards after starting up and then stopping completely, which usually happens when the robots optical tachometers that sense wheel motion get dirty. If cleaning its brush and cliff sensor doesn’t work, some suggest disassembling the Roomba unit, although this means voiding your warranty.
For detailed and illustrated instructions on disassembling your Roomba, see:
Although the newer Roomba models are designed to work on different surfaces, it is still possible for the drive wheel to become stuck. If you see the unit trying to move but not being able to, turn the unit backwards and inspect the wheels. Look for dirt, hair and other material that can get stuck between the wheels and its body. Clean this out and let the Roomba go. This Roomba repair should be able to get your little guy running again.
See:
Cleaning and Troubleshooting Your Roomba
Some people have also reported that their Roomba’s brushes don’t turn. The most logical solution would be to take out the brush rollers and remove all dirt, especially hair, which could be causing the mechanism to jam. One can also clean more thoroughly by accessing the unit’s belt. This is done by flipping the base upside down and removing the cover plate which holds the beater-bar and channels the dust into the “bag.”
The long area of this cover plate usually contains the belt channel. The belt should be stretched between the impeller shaft and the beater-bar. Once the cover is removed, take out the bar. On each end is a bearing assembly where lint, fuzz, string and other fibers can accumulate. This needs to be cleaned periodically.
Other owners say that their Roomba gathers dirt in its filter but not in the bin. This could be due to the unit’s fan being either plugged up or not spinning fast enough to pick up heavier dirt. If this happens, you can disassemble the back canister and clean out the fan chamber. You can also recheck the connections on the dirt tray. This dirt tray has a vacuum motor that assists the dirt flow picked up by the unit’s brushes.
If your Roomba stops and beeps, count the beeps after the initial “uh-oh” tone. If you get 3 beeps, that means your vacuum motor is stalled. You can remove the grill from the back of the dustbin and check if the impeller (the one that looks like a fan) is not clogged with dirt and can turn easily.
Afterward, try to run the robot with the bin on but the grill off so you can tell whether the vacuum impeller is spinning. If it isn’t, you'll need a new bin. You can also call customer support (1-877-855-8593) for assistance.
Some more Roomba problems and solutions can be found here at EESolutions.ca:
If however you feel safer about handing your broken Roomba to professional repair technicians, here are some links to Roomba repair companies:
Roomba Repair : Click HERE to go to iRobot's site.
New! Comments
Have your say about what you just read! Leave me a comment in the box below.